Sunday, August 3, 2014

Bacon Ranch Potato Salad


Continuing on with my summer BBQ theme here is a great potato salad to add to the mix.

This recipe was inspired by a recipe I saw on Dainty Chef but I didn't have all of the ingredients that she called for so I tweaked it a bit to work with what I had in the house. It came out super delicious and is something I will definitely make again.

Bacon Ranch Potato Salad
Adapted from Dainty Chef

Ingredients
4 lbs red potatoes, unpeeled and cut into 1/2 inch chunks
2 tbsp salt
1/4 cup mayonnaise
3/4 cup fat free Greek yogurt
1 bunch green onion, chopped
Juice of 1 lemon
2 tbsp milk
2 tsp garlic powder
2-3 tbsp Hidden Valley Ranch dip powder, to taste
8 slices bacon, chopped and cooked to crispy

Directions
Cover potatoes with 1-2 inches of cold water and add the salt. Bring to a boil over high heat, then reduce heat to medium and continue cooking until the potatoes are tender, about 8-12 minutes. Drain potatoes and transfer to a serving bowl. Allow to cool slightly.

While the potatoes are cooking, whisk together the mayonnaise, yogurt, green onion (reserve some for garnish), lemon juice, milk, garlic powder and dip powder in a small bowl. Add salt and pepper to taste, then refrigerate until ready to use.

Stir half of the dressing into the cooled potatoes. Refrigerate for at least an hour. Toss with remaining ranch dressing and bacon. Top with reserved green onions and serve.


Thursday, July 31, 2014

No Bake Cheesecake Parfaits


Here is another great summer dessert that is really easy to take with you to a BBQ or party!


These no bake cheesecake parfaits are assembled in mini mason jars so all you need to do it put the lid on them and take them with you wherever you go. It is a great way to have cheesecake in the summer when you don't want to turn the oven on. They were good plain and with the strawberry topping. Please note that the recipe below will make 12 mini mason jar parfaits but the recipe below for the strawberry topping will only top 6 of them with strawberry topping. If you want them all to have strawberry topping, then double the topping ingredients below.

No Bake Cheesecake Parfaits
Adapted from Annie's Eats

Ingredients

For the strawberry topping:
1 1/2 cups chopped strawberries
2 tbsp granulated sugar

For the graham cracker base:
3/4 cups graham cracker crumbs
1 tbsp granulated sugar
1 1/2 tbsp unsalted butter, melted

For the cheesecake layer:
8 oz reduced fat cream cheese
2 cups non fat Greek yogurt
1 1/2 cups confectioners' sugar, sifted
1 tsp vanilla
1 tbsp heavy cream

For the whipped cream layer:
1 cup heavy cream
2 tbsp granulated sugar

Directions
To make the strawberry topping, combine the strawberries and sugar in a small bowl and toss with a fork to combine. Let stand at least 1 hour, stirring once or twice, until the berries have released their juices. Mash the berries a bit with a fork. Cover and refrigerate until ready to use.

Set out 12 mini mason jars (small glasses will also work but not be as easily portable). In a small bowl, combine the graham cracker crumbs, sugar and butter. Stir with a fork until evenly combined. Scoop about 1 1/2 tablespoons of the mixture into the bottom of each jar and tamp down gently with the bottom of a small glass.

To make the cheesecake mixture, combine the cream cheese and Greek yogurt in the bowl of an electric mixer. Beat the mixture on medium-high speed until smooth, abut 1-2 minutes. Add in the confectioners' sugar and mix until well incorporated, 1-2 minutes. Blend in the vanilla and heavy cream, on low speed, then increase the speed to medium-high and beat until light and fluffy, 2-3 minutes more. Divide the mixture between the serving jars. Refrigerate for 1-2 hours to let set.

While the cheesecake layer is setting up in the refrigerator, combine the 1 cup heavy cream and 2 tbsp granulated sugar in the bowl of an electric mixer fitted with a wire whisk attachment. Whip on high speed until the cream is light and fluffy and has formed peaks.

Remove the jars from the refrigerator and top with the whipped cream. Spoon the strawberry topping (drain some of the liquid out of the strawberry mixture before using) on top of half of the jars. Place the lids on the jars and store in the refrigerator until ready to serve.

Makes 12 parfaits


Sunday, July 27, 2014

Summer Macaroni Salad with Tomatoes and Zucchini


I know, I know, I have been gone for a very long time. I am not sure if anyone even follows or looks up this blog anymore but I hope there are still some of you out there. I am sorry for the absence. There is no real excuse but I have missed blogging and hope to get back into it on a more regular basis. Joe has started a blog about his mixology called Drinks About Friends (check out the link on the right hand side) and helping him get his blog up and running has brought me back to mine so thanks Joe!

I took a look through my photos to see what items I had photographed but not blogged about yet and this macaroni salad caught my eye. I brought it to a friend's BBQ and it was a big hit. It is a Skinnytaste recipe so it is also much healthier than your traditional mayonnaise based macaroni salad. I really don't love mayonnaise so I tweaked the recipe a little bit to use more Greek yogurt and less mayo which is reflected in my version of the recipe below.

If you need a macaroni salad for an upcoming gathering, I recommend this one!


Summer Macaroni Salad with Tomatoes and Zucchini
From Skinnytaste.com

Ingredients
16 oz uncooked elbow macaroni
4 cups grape tomatoes, cut in half
2 cups (1 small) zucchini, sliced and quartered
1/2 cup red onion, finely chopped
5 tbsp light mayonnaise (Hellman's)
2 1/2 tsp red wine vinegar
4 tbsp fat free Greek yogurt
2 tsp Dijon mustard
1/4 tsp oregano
1/4 tsp garlic powder
salt and pepper to taste

Directions
Cook pasta in generously salted water according to package directions. Drain and rinse with cold water.

In a medium bowl, combine onions, mayonnaise, vinegar, yogurt mustard, oregano, garlic powder; mix well. Add tomatoes (and any juice from the tomatoes), zucchini, pasta, salt and pepper to taste, toss well and place in a large bowl.

Makes 16 cups


Saturday, October 20, 2012

Cranberry-Orange Cream Scones


The other type of scone that I made was a more traditional scream scone with a biscuit texture rather than a cake texture. They were still light and fluffy and moist though, not dry and cracking like I often see of scones purchased from a bakery. These scones I made fresh on Sunday morning, rather than the blueberry scones which were done ahead of time. Both types were gobbled up by our friends for breakfast so I would say they were both a success!

Cranberry-Orange Cream Scones
From Cook's Illustrated

Ingredients
2 cups all-purpose flour
3 tbsp sugar
1 tbsp baking powder
1/2 tsp salt
5 tbsp unsalted cutter, cut into 1/4-inch pieces and chilled
1 tsp grated fresh orange zest
1/2 cup dried cranberries
1 cup heavy cream

Directions
Adjust oven rack to middle position and heat oven to 450 degrees F. Line baking sheet with parchment paper.

Pulse flour, sugar, baking powder, and salt together in food processor to combine, about 3 pulses. Scatter butter and orange zest evenly over top and continue to pulse until mixture resembles coarse meal with some slightly larger pieces of butter, about 12 more pulses. Transfer mixture to large bowl ad stir in dried cranberries. Stir in cream until dough beings to form, about 30 seconds.


Turn dough and any flour bits out onto floured counter and knead until rough, slightly sticky ball forms, 5 to 10 seconds. Pat dough into 9-inch round and cut into 8 wedges.


Place wedges on prepared baking sheet. Bake until tops or scones are lightly golden brown, 12 to 15 minutes, rotating baking sheet halfway through baking. Transfer baking sheet to wire rack and let cool for at least 10 minutes. Serve warm or at room temperature.


Thursday, October 18, 2012

Blueberry Scones


Continuing with my HP weekend recipes, we are now onto Sunday morning's breakfast. I made two different kinds of scones. These blueberry scones I was able to make earlier in the week, freeze and then bake them directly from frozen. They have a great crunchy exterior with the sugar on top and a nice soft interior loaded with blueberries. You could also substitute other berries like blackberries in this recipe with great results as well.

Blueberry Scones
From Cooks Illustrated

Ingredients
16 tbsp unsalted butter (2 sticks), each stick frozen
1 1/2 cups blueberries
1/2 cup milk
1/2 cup sour cream
2 cups all-purpose flour
1/2 cup plus 1 tbsp sugar
2 tsp baking powder
1/4 tsp baking soda
1/2 tsp salt
1 tsp grated lemon zest

Directions
Adjust oven rack to middle position and heat oven to 425 degrees F. Line baking sheet with parchment paper. Remove half of wrapper from each stick of frozen butter. Grate unwrapped ends (half of each stick) on large holes of box grater (you should grate a total of 8 tablespoons). Place grated butter in freezer until needed. Melt 2 tablespoons of remaining ungrated butter and set aside. Save remaining 6 tablespoons butter for another use. Place blueberries in freezer until needed.

Whisk milk and sour cream together in medium bowl; refrigerate until needed. Whisk flour, 1/2 cup sugar, baking powder, baking soda, salt and lemon zest in medium bowl. Add frozen grated butter to flour mixture and toss with fingers until butter is thoroughly coated.

Add milk mixture to flour mixture and fold with rubber spatula until just combined. Using spatula, transfer dough to liberally floured counter. Dust surface of dough with flour and with floured hands, knead dough 6 to 8 times, until it just holds together in ragged ball, adding flour as needed to prevent sticking.

Roll dough into approximate 12-inch square. Fold dough into thirds like a business letter, using bench scraper or metal spatula to release dough if it sticks to counter. Lift short ends of dough and fold into thirds again to form approximate 4-inch square. Transfer dough to plate lightly dusted with flour and chill in freezer 5 minutes.

Transfer dough to floured counter and roll into approximate 12-inch square again. Sprinkle blueberries evenly over surface of dough, then press down so they are slightly embedded in dough. Using bench scraper or thin metal spatula, loosen dough from counter. Roll dough into cylinder, pressing to form tight log. Arrange log seam side down and press into 12 by 4-inch rectangle. Using sharp, floured knife, cut rectangle crosswise into 4 equal rectangles. Cut each rectangle diagonally to form 2 triangles and transfer to prepared baking sheet.

Brush tops with melted butter and sprinkle with remaining 1 tablespoon sugar. Bake until tops and bottoms are golden brown, 18 to 25 minutes. Transfer to wire rack and let cool for at least 10 minutes before serving.

TO MAKE AHEAD:  After placing scones on baking sheet, either refrigerate them overnight or freeze for up to 1 month. When ready to bake, for refrigerated scones, heat oven to 425 degrees F and follow baking directions above. For frozen scones, do not thaw, heat oven to 375 degrees F, brush the tops with melted butter and sugar and bake for 25 to 30 minutes.

Saturday, October 13, 2012

Short Rib Shepard's Pie


I have never been a big fan of shepard’s pie until I saw this recipe. Traditional shepard’s pie is made with ground beef and the texture was something that never really caught my fancy. The use of short ribs slow cooked in red wine and then shredded was a much more pleasing texture to me. And the flavor that the short ribs had was out of this world. I think everyone at dinner wished I had doubled the recipe because they could have eaten at least another serving each. The only thing I plan on doing next time I make this recipe is to add more vegetables to the filling so it doesn't feel like it is only meat topped by fluffy and crunchy potatoes.

This recipe does take quite a long time to make, but I had a roomful of happy faces tell me it was definitely worth it!

Short Rib Shepard’s Pie

Ingredients:
4-5 lbs boneless beef short ribs
Sea salt and ground pepper
2 tbsp extra virgin olive oil
1 large onion, chopped
2 stalks celery, chopped
6 cloves garlic, crushed
1 carrot, chopped
3 ½ cups dry red wine such as Syrah
3 bay leaves
1 tbsp fresh thyme leaves
4  cups, or as needed beef stock
1 ½ lbs Yukon gold potatotes, peeled and quartered
¼ milk
4 tbsp unsalted butter
1 egg yolk, beaten

Directions:

Season ribs with salt and pepper and refrigerate for at least 6 hours or up to overnight. Bring to room temperature and season again with salt and pepper.

Preheat oven to 350 degrees F. Heat a large sauté pan over high heat until hot. Add olive oil and heat until shimmering. In batches, sear ribs on all sides, turning as needed, until well browned. Transfer to a Dutch oven. Pour off all but 2 tbsp fate from sauté pan and return to medium heat. Add onion, celery, garlic and carrot and sauté until beginning to caramelize, about 5 minutes. Add wine, bay leaves, and thyme, raise heat to medium-high, and boil to reduce wine by half. Add stock, bring to a boil, and pour contents of pan over ribs. They should be just covered with liquid; add stock as needed.


Cover tightly and braise in oven, adding stock as needed to maintain liquid level, until a fork slides easily through meat, about 2 ½ hours. Skim off any fat from surface, let ribs cool in liquid until they can be handled, then remove ribs from pot and pull meat from bones. Shred meat into bite-sized pieces, return to Dutch oven, and discard bones.


While ribs are cooling, in a saucepan, cook potatoes in boiling salted water until tender, about 15 minutes. Drain, dry in pan over low heat, then pass through ricer back into warm pan. In a small saucepan, heat milk and butter until mixture is steaming. Pour into potatoes, add egg yolk and fold to mix well.


Raise oven temperature to 400 degrees F. Transfer contents of Dutch oven to a 9x13 inch baking dish or divide among 6 – 8 individual gratin dishes. Cover top(s) evenly with potatoes. Bake until topping is golden, 35-40 minutes. Serve at once.

Friday, October 12, 2012

Rock Cakes


Hagrid’s rock cakes were always so hard they were nearly inedible. It turns out that his two mistakes were over mixing his dough and cooking his cakes for too long. If you are careful to keep both of these things in mind, you will create a cookie that is very soft and delicious. Keep in mind though that these are best served the day they are made, preferably within hours of baking. They do lose some of their soft and chewy texture the longer they sit. The original recipe called for raisins but I substituted dried cranberries for the raisins in my batch.

Rock Cakes
Adapted very slightly from The Unofficial Harry PotterCookbook

Ingredients:
2 cups all-purpose flour
½ cup granulated sugar
1 tsp baking powder
½ tsp cinnamon
¼ tsp salt
1 stick (8 tbsp) unsalted cold butter, cut into chunks
1 large egg
½ cup whole milk
1 cup dried cranberries

Directions:
Preheat the oven to 350 degrees F and grease and flour a large cookie sheet (or use a silicone mat). Combine the flour, sugar, baking powder, cinnamon and salt in a large mixing bowl. With your fingertips, rub the butter into the dry ingredients until the mixture reaches the consistency of wet sand.

Beat the egg together with the milk and pour it into the flour-butter mixture. Fold it together using a spatula to form a stiff dough. Fold in the dried cranberries. Drop dough by rounded tablespoonfuls 2 inches apart on the prepared cookie sheet.

Bake for 25 minutes or until the bottom are golden, rotating the pan midway through baking.


Thursday, October 11, 2012

Harry Potter Weekend


Joe and I along with a group of our friends are very big Harry Potter fans. Very big Harry Potter fans. We have all read the books and seen the movies multiple times. We decided it would be fun to get together for an entire weekend to watch the movies and play some Harry Potter trivia. For Christmas, Joe bought me the Harry Potter cookbook so I thought it would be fun to create a menu for the weekend that centered around food themes that appeared in the books and “British” food.

We all had a blast and got through most of the movies in a 36 hour period. It was such a success that our friends are begging us to do it again.  We have met some new people that haven’t been exposed to Harry Potter so we will have to initiate them into the wonderful world of HP in the near future.

We served lunch, dinner and dessert on Saturday and breakfast and lunch on Sunday. The menu included:


Saturday Lunch
Chicken salad with tomato on cocktail rye bread
Egg salad on cocktail pumpernickel bread
Fresh and smoked mozzarella with fresh tomato and basil on a baguette with balsamic vinegar
Cucumber sandwiches filled with cream cheese mixed with craisins, walnuts and cinnamon
Rock Cakes

Saturday Dinner
Short Rib Shepard’s Pie

Saturday Dessert
Apple crumble with vanilla ice cream and fresh whipped cream

Sunday Breakfast
Cranberry Orange Scones
Blueberry Scones
Bacon

Sunday Lunch

Recipes to come in future posts so stay tuned!


Monday, July 30, 2012

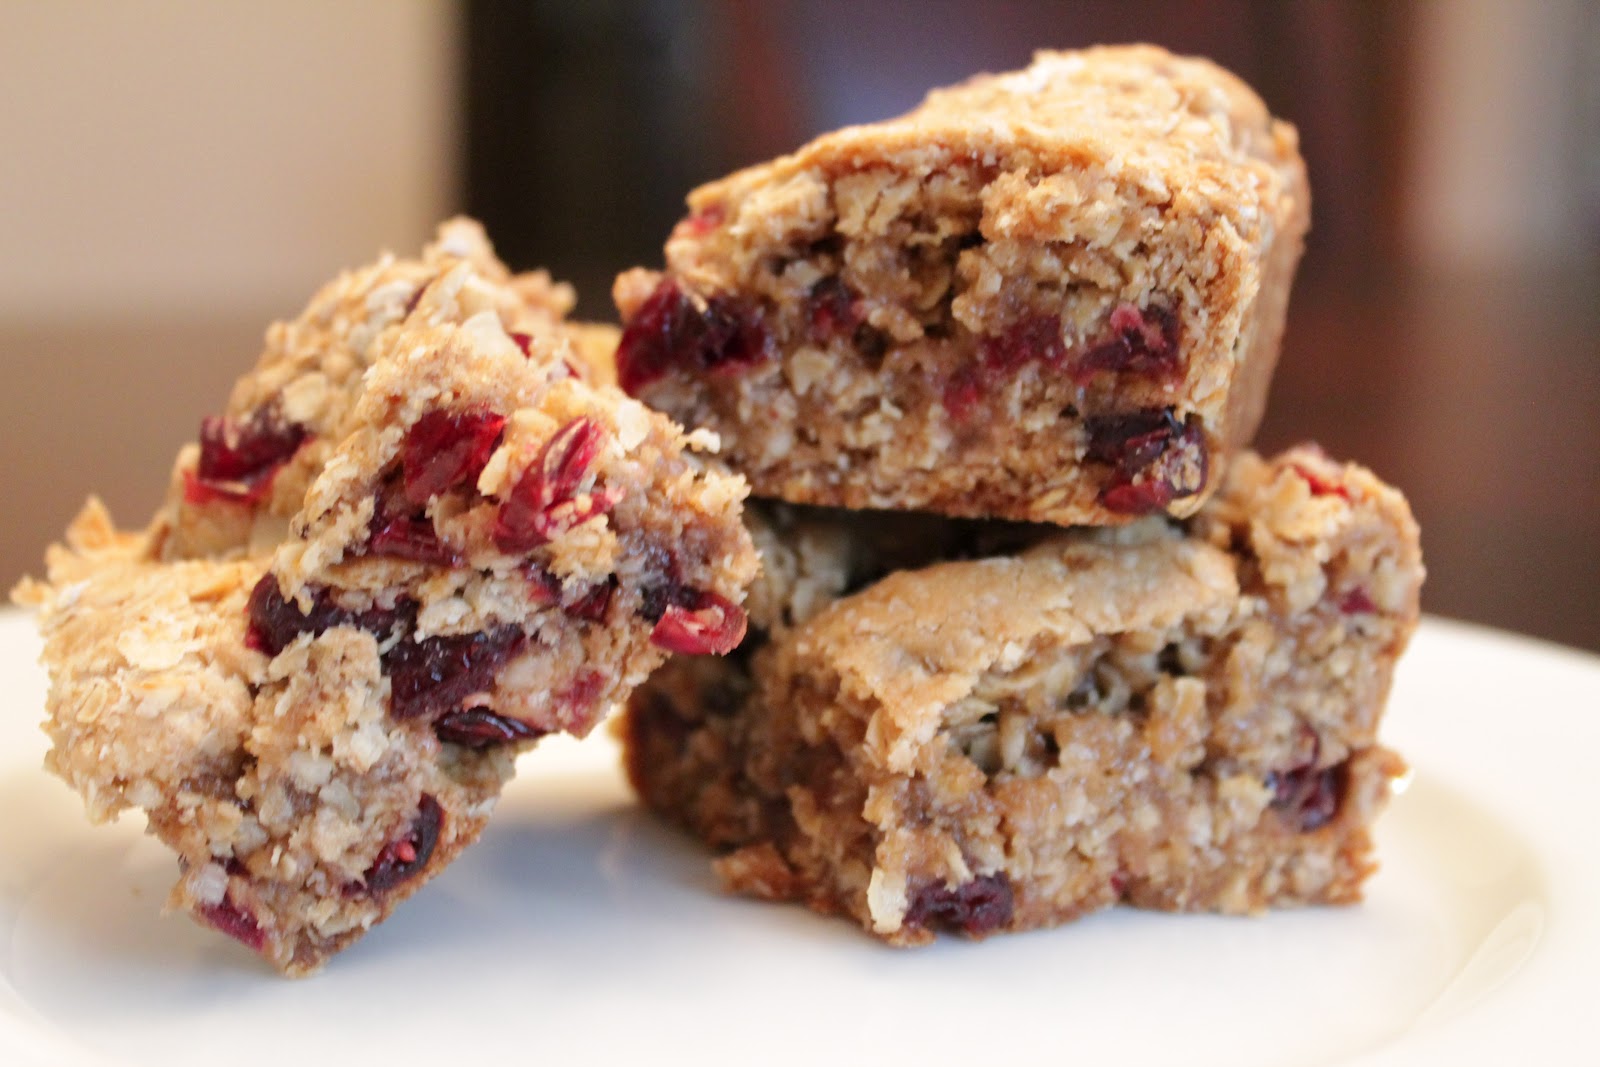
Dried Cranberry Cookie Bars


Awhile back I was looking for a dessert to make and I stumbled across these Oatmeal Raisin Cookie Bars from Baking Bites. They looked so nice, and moist and chewy, I knew I had found the dessert to make. Being that my brother David was going to be at the dinner these were meant to be dessert for and he doesn't like raisins, I substituted dried cranberries in place of the raisins in the recipe. They gave them a nice sweet texture. I also doubled the original recipe since I usually need to make larger quantities for our crowd. I baked mine in a 13x9 inch pan. Click on the link for the original recipe if you want to make a smaller batch.

Keep an eye on these while baking. It is important not to overbake them, so that they retain their chewy texture rather than becoming dry. The bars should look set in the center and have a nice light golden color on top.

Dried Cranberry Cookie Bars
From Baking Bites

Ingredients:
2 cups all purpose flour
1 cup sugar
1 cup brown sugar
1 tsp salt
1 tsp ground cinnamon
1/2 tsp freshly ground nutmeg
2 tsp vanilla extract
2 large eggs
1 cup butter, melted and cooled
4 cups quick cooking (not instant) oats
3 cups dried cranberries

Directions:
Preheat oven to 350 degrees. Line a 13x9 inch baking pan with parchment paper.

Whisk together flour,sugar, brown sugar, baking soda, salt and spices in a large bowl. Make a well in the center of the flour mixture and stir in vanilla, egg and melted butter until smooth. Stir in oats and dried cranberries until they are evenly distributed.

Pour dough into prepared pan and spread into an even layer with a spatula or your fingers. Bake for 22-26 minutes, or until bars are set and the center no longer looks wet. Edges will be golden brown. Cool pan on a wire rack before slicing. Cut into bars and serve.

Saturday, July 28, 2012

Baked Apples


My mom was the first to discover these baked apples and I am so glad she did. She made them for Christmas Eve dinner one year and both of us have made them numerous time since. They have the perfect texture, the apples are cooked but not mushy and the cornbread stuffing has a great mix of flavors. The last time we made them was for my Grandfather's birthday earlier this year and they went over very well. We cut them into quarters but you can cut them in half or leave them whole. They also taste great, leftover the next day, warm or cold.

Baked Apples
From The Food Network

Ingredients:
8 Gala or Golden Delicious apples
1 lemon, juiced
1/4 cup (1/2 stick) unsalted butter, at room temperature
1 or 2 large corn muffins, crumbled (about 1/2 cup), reserve some for sprinkling on apples
1/2 cup golden raisins
6 sage leaves, chopped
2 garlic cloves, minced
1/4 cup dark brown sugar
Kosher salt and freshly ground black pepper
1 cup hard cider
1 tbsp lemon juice

Directions:
Core the apples with an apple corer, making a good size cavity to hold the stuffing. Rub the cut sides of the apples with some of the lemon juice to prevent them from browning while you make the stuffing.

In a mixing bowl, combine the softened butter, muffin crumbs, raisins, sage, garlic, brown sugar, salt and pepper. Spoon the stuffing into the cavities of the cored apples. stand them up side by side in a baking dish and sprinkle the tops with the reserved muffin crumbs. Pour the cider around the apples and bake for 30 to 35 minutes at 375 degrees F until soft when pierced with a knife.

Place the warm apples, cut or uncut, into a serving dish. Spoon the cider sauce around the apples and serve.


    Thursday, July 26, 2012

    Spicy Asian Noodles with Chicken


    Along the lines with my last post, here is another quick and healthy weeknight meal. I upped some of the ingredient amounts from the original recipe, since I like my noodles a little saucier than they come out when made exactly as described. We make this one quite often now, especially since Asian flavors are some of Joe's favorite. Enjoy!

    Spicy Asian Noodles with Chicken
    From Cooking Light

    Ingredients:
    1 tbsp dark sesame oil, divided
    1 tbsp grated peeled fresh ginger
    2 cloves garlic, minced
    2 cups chopped roasted skinless, boneless chicken breast
    1/2 cup chopped green onions
    1/4 cup chopped fresh cilantro
    5 tbsp low sodium soy sauce
    3 tbsp rice vinegar
    3 tbsp hoisin sauce
    2 tsp sambal oelek(ground chili paste)
    1 (6.75 ounce) package thin rick sticks (rice flour noodles)
    2 tbsp chopped dry roasted peanuts

    Directions:
    Heat 2 tsp sesame oil in a small skillet over medium-high heat. Add ginger and garlic to pan; cook 45 seconds, stirring constantly. Place in a large bowl. Stir in remaining 1 tsp oil, chicken and next 6 ingredients (through sambal).

    Cook noodles according to package directions. Drain and rinse under cold water; drain. Add noodles to bowl; toss well to coat. Sprinkle with peanuts.

    Tuesday, July 24, 2012

    Monkey Bread


    I have had monkey bread many times before but I have never made it myself. The ones that I have had all were made using pre-made biscuit dough and while they were delicious, they don't hold a candle to the flavor and texture to this mixture. Five people at the entire pan in less than an hour and we wanted more. Thank goodness this recipe takes quite a long time to make or I might be tempted to make it much more often which would really hinder my goals or becoming more healthy. It is definitely worth the time and effort for a special treat or occasion.

    Monkey Bread
    From Brown Eyed Baker

    Ingredients:
    Dough
    4 tbsp unsalted butter, divided, 2 tbsp softened and tbsp melted
    1 cup milk, warm (about 110 degrees F)
    1/3 cup water, warm (about 110 degrees F)
    1/4 cup granulated sugar
    1 package instant yeast
    3 1/4 cups all purpose flour, plus extra for work surface
    2 tsp salt

    Brown Sugar Coating
    1 cup light brown sugar
    2 tsp ground cinnamon
    8 tbsp unsalted butter (1 stick), melted

    Glaze
    1 cup confectioners' sugar
    2 tbsp milk

    Directions:
    Butter Bundt pan with 2 tbsp softened butter. Set aside.

    In a large measuring cup, mix together milk, water, melted butter, sugar and yeast. Mix flour and salt in standing mixer fitted with dough hook. Turn machine to low and slowly add milk mixture. After dough comes together, increase speed to medium and mix until dough is shiny and smooth, 6 to 7 minutes. Turn dough onto lightly floured counter and knead briefly to form smooth, round ball. Coat large bowl with nonstick cooking spray. Place dough in bowl and coat surface of dough with cooking spray. Cover bowl with plastic wrap and place in a draft free area until dough doubled in size, 50 to 60 minutes.


    For the sugar coating:  While the dough is rising, mix brown sugar and cinnamon together in a bowl. Place melted butter in a second bowl. Set aside.


    To form the bread:  Gently remove the dough from the bowl, and pat into a rough 8-inch square. Using a bench scraper or knife, cut dough into 64 pieces.

    Roll each dough piece into a ball. Working one at a time, dip the balls into the melted butter, allowing excess butter to drip back into the bowl. Roll in the brown sugar mixture, then layer balls in the Bundt pan, staggering seams where dough balls meet as you build layers.


    Cover the Bundt pan tightly with plastic wrap and place in a draft free area until dough balls are puffy and have risen 1 to 2 inches from top of pan, 50 to 70 minutes.

    Preheat oven to 350 degrees F. Unwrap the pan and bake until the top is deep brown and caramel begins to bubble around the edges, 30 to 35 minutes. Cool in the pan for 5 minutes, then turn out onto a platter and allow to cool slightly, about 10 minutes.

    For the glaze:  While the bread cools, whisk the confectioners' sugar and milk in a small bowl until the lumps are gone. Using a whisk, drizzle the glaze over the monkey bread, letting it run over top and down the sides of the bread. Serve warm.


    Sunday, July 22, 2012

    Jamaican Chicken Stew


    I am back! Sorry for the extra long hiatus. Not having a laptop really crimps my schedule. Luckily I think we have decided on one and will be ordering it this week. Luckily, just because I haven't been blogging doesn't mean that I haven't been cooking. I have lots of posts to get ready to go over the coming weeks.


    Joe and I are trying to eat better and workout more so I have been trying to make dishes that are not only healthier but quick to make since we are both off at the gym after work quite a few days of the week. This recipe fits the bill. It is great served over rice, or even just over some nicely steamed broccoli.


    Jamaican Chicken Stew
    From Cooking Light


    Ingredients:
    2 tsp olive oil
    1 cup chopped onion
    1 1/2 tsp minced garlic
    1 pound boneless,skinless chicken breast, cut into bite size pieces
    1 tsp curry powder
    1 tsp dried thyme
    1/2 tsp ground allspice
    1/2 tsp crushed red pepper
    1 tsp cracked black pepper
    1/4 cup dry red wine
    2 tbsp capers
    1 (15 ounce) can black beans, rinsed and drained
    1 (14.5 ounce) can diced tomatoes

    Directions:
    Heat oil in a large nonstick skillet over medium-high heat. Add onion and garlic; saute 3 minutes or until tender. Combine chicken and the next 5 ingredients (chicken through black pepper) in a bowl. Add chicken mixture to pan; saute 4 minutes. Stir in wine, capers, beans and tomatoes. Cover, reduce heat and simmer 10 minutes or until tender. Serve over rice or steamed broccoli

    Wednesday, April 4, 2012

    Chicken Shawarma


    The first time I made this recipe it was indoors on a grill pan. Now that spring is here and our grill is out of the shed, I can't wait to make it again over the open fire. This recipe is from Cooking Light and often I find that I need to increase the amount of spices I use in their recipes but I didn't have to adapt this one at all. The flavors on the chicken and in the sauce were both right on. The only addition I made was a couple of slices of avocado since I had a ripe one I had to use and I really like the flavor of the creamy cool avocado with the over flavors involved. This has become a regular in our house and is so easy to make for a weeknight meal.

    Chicken Shawarma
    From Cooking Light

    Ingredients:
    Chicken:
    2 tbsp fresh lemon juice
    1 tsp curry powder
    2 tsp extra virgin olive oil
    3/4 tsp salt
    1/2 tsp ground cumin
    3 garlic cloves, minced
    1 lb skinless, boneless chicken breast, cut into 16 strips

    Sauce:
    1/2 cup plain 2% reduced fat Greek yogurt
    2 tbsp tahini (sesame paste)
    1/4 tsp salt
    1 garlic clove, minced

    Remaining Ingredients:
    Cooking spray
    4 (6-inch) pitas
    Lettuce
    Tomato Slices
    Avocado Slices

    Directions:
    Preheat grill or grill pan to medium-high heat.

    To prepare chicken, combine first 6 ingredients in a medium bowl. Add chicken to bowl; toss well to coat. Let stand at room temperate 20 minutes.

    To prepare sauce, combine yogurt and next 4 ingredients (through 1 garlic clove), stirring with a whisk.

    Spray grill or gill pan with cooking spray and cook chicken 4 minutes on each side or until done.

    Place pitas on grill rack; grill 1 minute on each side or until lightly toasted. Place 1 pita on each of 4 plates; top each pita with lettuce, tomato and avocado. Add chicken and sauce and serve immediately.


    Monday, April 2, 2012

    How to Make Homemade Pizza Dough


    Hello all, again I have to apologize for my long absence. My laptop died and although Joe readily shares our other computer with me, I sometimes find it hard to get motivated to go into the office and use the desktop. Some kind of mind block I guess. So here I sit, early on a Sunday morning trying to catch up on a myriad of posts that I have to write. Because, although I have not been blogging, I have still been cooking.

    This post is from something that I made in late January. At that point, I was too superstitious to post about it. Confused, I will explain. Joe and I along with my parents and my brothers are HUGE Giants football fans. If any of you are fellow Giants fans you will know that this past season was very up and down but with a great ending. We think the Giants started to turn the heat up in the game against the Jets on Christmas Eve. Well we were all together to watch that so of course we had to get together the next week to watch too. We watched together and they won. So of course we had to watch the wild card round of the playoffs together (are you sensing a pattern here?) It was for that wild card game that I decided to make pizzas. Joe and I had been making them for ourselves for quite awhile but had never shared them with my family. They were a big hit but I couldn't blog about them yet. What if I let the secret out and then they lost. Every week I said, ok if they lose I will write the post, but they never lost. They went all the way on to win the Superbowl. Then I was in the clear to blog about it and my laptop died. Such is life I guess.

    I served 3 different pizzas that day, a traditional Chicago deep dish, a BBQ Chicken and a veggie pizza with roasted red pepper sauce. Here is the recipe for the pizza dough that I have not yet shared and the veggie pizza. Enjoy!


    Pizza Dough
    From Annie's Eats


    Ingredients: 
    ½ cup warm water
    2¼ tsp. instant yeast
    4 cups (22 oz.) bread flour, plus more for dusting
    1½ tsp. salt
    1¼ cup water, at room temperature
    2 tbsp. extra-virgin olive oil

    Directions: 
    Measure the warm water into a 2-cup liquid measuring cup.  Sprinkle the yeast over the top.  In the bowl of a stand mixer fitted with the paddle attachment, combine the bread flour and salt, mixing briefly to blend.  Measure the room temperature water into the measuring cup with the yeast-water mixture.  With the mixer on low speed, pour in the yeast-water mixture as well as the olive oil.  Mix until a cohesive dough is formed.  Switch to the dough hook.  Knead on low speed until smooth and elastic, about 5 minutes.  Transfer to a lightly oiled bowl, turning once to coat.  Cover with plastic wrap and let rise until doubled in size, 1½-2 hours.

    Press down the dough to deflate it.  Transfer the dough to a lightly floured work surface.  Divide the dough into two equal pieces.  Form each piece of dough into a smooth, round ball.  (If freezing the dough, wrap in plastic wrap and freeze at this point.)  Cover with a damp cloth.  Let the dough relax for at least 10 minutes but no longer than 30 minutes.

    To bake, preheat the oven and pizza stone to 500˚ F for at least 30 minutes.  Transfer the dough to your shaping surface, lightly sprinkled with cornmeal.  Shape the dough with lightly floured hands.  Brush the outer edge lightly with olive oil.  Top as desired.  Bake until the crust is golden brown, and cheese is bubbling, 8-12 minutes.


    Veggie Pizza with Roasted Red Pepper Sauce
    From Colleen's Kitchen Therapy

    Ingredients:
    1 ball of pizza dough, shaped and prepared as directed above
    1 12oz. jar roasted red pepper
    1 1/2 cups tomato puree
    1/3 tsp. crushed red pepper flakes
    1 ts. garlic powder
    1 med onion, sliced thin
    1 bell pepper, large chop
    6-8 cremini mushrooms, sliced
    2 tsp. olive oil
    2 cup gouda cheese, shredded

    Directions:
    In a food processor or blender, combine the roasted red pepper and tomato puree and pulse until the pepper are chopped small and blended into the tomato puree. Transfer to a saucepan, add red pepper flakes and garlic powder and cook over low heat for 20 minutes.

    While the sauce is cooking, in a large saute pan, heat the olive oil over medium high heat. Add the onions and cook, 3-4 minutes until they start to get soft. Add in the pepper and mushrooms and cook another 4-5 minutes until the onions are nice and soft, and the pepper and mushrooms are cooked but still have a bit of a bite to them. Transfer to a plate lined with paper towels to soak up some of the liquid.

    Spread the sauce a little at a time onto your prepared pizza dough. You will have more sauce than is needed for one pizza. Save the rest and use for pasta or another pizza. Sprinkle the cheese on top of the layer of sauce. Add the vegetables. Bake in a 450 degree oven for 10-15 minutes until the crust is brown and the cheese is bubbly


    Friday, February 24, 2012

    Broccoli Cheddar Soup - Recipe Swap


    I had so much fun with my first recipe swap that I decided to jump right in to the next one, especially when I saw the category - soup. I love soup, all kinds of soup. I could eat it everyday. There is just something so welcoming about a bowl of piping hot soup. My kind of comfort food. This past Wednesday was the perfect day for me to try out my swap recipe from Jenna at Jenna's Cooking Journey. It was Ash Wednesday and as all you Catholics out there know, we don't eat meat on Ash Wednesday.

    Unfortunately, I didn't plan ahead very well and didn't have all of the ingredients for Jenna's recipe but I had enough that I could give it a go with just a couple of substitutions. Joe was a little skeptical about just having soup for dinner but with the knowledge that there were leftovers in the refrigerator in case he needed them, he was ok with the plan. Let me tell you, after two large cups of soup, he proclaimed himself full and didn't need to touch the leftovers stashed in the fridge!

    The soup was very good, nice and thick and creamy with great flavor and wasn't difficult to make at all. I didn't have enough cheddar for what the recipe called for so I put in a mix of Monterrey jack and cheddar. I didn't have any veggie broth or stock so I used water and added some garlic in with the onions and carrots. Also, I tried to lighten it up a big by using fat free half and half instead of regular half and half. There are leftovers at home that I can't wait to have for lunch this weekend!

    Broccoli Cheddar Soup
    Very slightly adapted from Jenna's Cooking Journey

    Ingredients
    1 0r 2 bunches (12 ounces) fresh broccoli, cut into florets
    1/4 cup plus 2 tbsp butter, divided
    1 medium yellow onion, diced
    1 medium carrot, julienned or grated
    2 garlic cloves, minced
    1/4 cup flour
    2 cups fat free half and half
    2 cups water, plus more if needed
    1/4 tsp nutmeg
    4 ounces good sharp cheddar cheese, freshly grated
    4 ounces Monterrey jack cheese, freshly grated
    Salt and pepper to taste

    Directions
    Bring a large pot of salted water to a boil. Drop the broccoli florets into the boiling water and cook for 2-3 minutes. Remove broccoli and place into a large bowl of ice water. Once cooled, drain the broccoli and set aside.

    In large pot or dutch oven, saute the onions, carrots and garlic in 2 tbsp of butter until soft, about 4 minutes. Remove and set aside.

    Add 1/4 cup of butter to the pan over medium heat. Once butter is melted, add in the flour and stir constantly for 2-3 minutes. Slowly whisk in half and half and water until completely incorporated. Add in nutmeg and stir. Cover and simmer over low heat for 20 minutes.

    Add the onions, carrots, garlic and broccoli back into the pot. Add more water if you feel the soup is too thick (I add an additional cup at this point). Stir and cover and simmer for another 20-25 minutes.

    Use a potato masher to break up the broccoli florets to your desired size (I kept most of my pretty big). Add in 3/4 of each type of cheese. Season with kosher salt and fresh ground black pepper to taste.

    Serve immediately with additional cheese as garnish.

    Friday, February 10, 2012

    My First Recipe Swap - Roasted Rosemary-Onion Potatoes


    I gathered the courage earlier this month to enter a recipe swap that is done on a monthly basis among a wonderful group of food bloggers and cooks that belong to a message board that I frequent. I had been following a lot of their blogs for the past few months and I loved the idea of a recipe swap. Here's how it works, a theme for the swap is created then everyone has to submit one of their recipes. You are then given someone else's recipe to make and report back on by a certain date.

    This month's category was potato recipes. I submitted my recipe for home fries and got Jaida from Sweet Beginning's recipe for Rosemary-Onion Potatoes to try. I love potatoes, especially roasted potatoes so I was excite to try out this recipe. I made them earlier this week for dinner with meatloaf and both Joe and I enjoyed them very much. I didn't deviate from the original recipe too much but I did use Yukon Gold potatoes instead of red potatoes since that is what I had in the house. I also used dried rosemary and thyme since I didn't have any fresh. I really like how the onions got nice and soft and sweet. I think they really helped to create a great flavor profile.

    So, one recipe swap down, hopefully many more to go!

    Roasted Rosemary-Onion Potatoes
    Slightly adapted from Sweet Beginnings

    Ingredients
    4 medium Yukon Gold potatoes
    1 small onion, finely chopped
    2 cloves garlic, minced
    2 tbsp olive oil
    1.5 tsp dried rosemary, crushed
    2/3 tsp dried thyme leaves
    1/4 tsp kosher salt
    1/4 tsp fresh ground pepper

    Directions
    Preheat oven to 450 degrees F. Line a baking sheet with foil or spray with cooking spray.

    Cut potatoes into 1 inch chunks. Mix remaining ingredients in a large bowl. Add potatoes and toss to coat. Spread potatoes in a single layer on baking sheet.

    Bake 20 to 25 minutes, turning once, until potatoes are golden brown and tender when pierced with a fork.

    Thursday, February 2, 2012

    Smothered Pork Chops


    I was looking for something different to make for dinner a while back and while trolling blogs I came across this post on my friend Melissa's blog. I didn't have pork tenderloin which Melissa used in her original recipe but I had some nice thin boneless pork chops at home and I knew they would work just as well. As promised, this was quick and easy to put together and was really tasty. We had dinner that night and I think both of us had some leftovers for lunch the next day.

    Smothered Pork Chops
    Slightly adapted from I Was Born to Cook

    Ingredients
    3/4 cup flour
    3 tbsp garlic powder
    2 tsp cayenne pepper
    1 tsp salt
    1 tsp black pepper
    4 thin boneless pork chops
    2 tbsp extra virgin olive oil, divided
    2 cups chicken broth
    1 cup heavy cream or half and half
    1 package (10 oz) cremini mushrooms, sliced
    1 large sweet onion, sliced
    Flat leaf parsley, for garnish

    Directions
    Place the flour in a shallow baking dish and add garlic powder, cayenne pepper, salt and black pepper. Mix with a fork. Dredge pork chops in flour mixture, shaking off excess

    Heat 1 tbsp oil in a large skillet and add pork chops. Cook chops on each side until golden brown, 3-4 minutes. Remove from pan and tent loosely with foil to keep warm. Add additional 1 tbsp oil and add mushroom and onions. Cook until soft, about 5-6 minutes. Sprinkle about 2 tbsp of the seasoned flour over the mushrooms and onions and pan drippings. Stir to cook the flour into the mixture. Add the chicken broth, stirring to release any bits stuck to the bottom of the pan. Add the heavy cream and cook, stirring often, until the mixture comes to a rolling boil and has thickened.

    Return pork to the pan and cover in sauce.  Simmer for 3-4 minutes and season with additional salt and pepper if necessary. Garnish with parsley and serve.

    Tuesday, January 31, 2012

    Pan Seared Scallops


    I think the cookbook that I was most excited to get for Christmas was the Cooks Illustrated Cookbook, better known as the bible of cooking. It is a wonderful resource for doing just about anything in the kitchen and would be a great addition to anyone's kitchen. It isn't flashy with tons of pictures but the recipes and techniques are well tested and won't let you down.

    I made the cauliflower pesto I posted about earlier this week for Joe and I on New Years Eve. We were going out later with friends but weren't meeting until after dinner so I wanted to make something special for the two of us to have at home for dinner before we went out. I decided on seared scallops with spaghetti and cauliflower pesto. I love scallops, they are one of the very few things from the sea that I do like. I have tried to cook them at home before and they either come out too rubbery or just don't brown and it has always made me frustrated.

    I turned to my Cooks Illustrated Cookbook in hopes that they might have something that could help me and boy did they! Turns out that for home cooks there are two things that get in the way of making a great pan seared scallop. First, most of the scallops that we can get our hands on are chemically treated with a solution called STP to increase shelf life and retain moisture which make them overly wet and hard to sear. Second, the stoves most of us have in our homes are much weaker than those in restaurants so it is hard to bring them up to the temperatures needed to properly sear a scallop. Cooks Illustrated has come up with a solution for both issues. Using their methods, these were the best pan seared scallops I have ever been able to make.

    Pan Seared Scallops
    From Cooks Illustrated Cookbook

    Ingredients
    1 quart cold water
    1/4 cup lemon juice
    2 tbsp salt
    1 1/2 lbs large seas scallops, tendons removed
    Ground pepper
    2 tbsp vegetable oil
    2 tbsp unsalted butter
    Lemon wedges or your favorite sauce

    Directions
    Combine cold water, lemon juice and salt in a large bowl. Add scallops and soak for 30 minutes. Remove scallops from water mixture and place on rimmed baking sheet lined with a clean kitchen towel. Place second clean kitchen towel on top of scallops and press lightly on towel to blot liquid. Let scallops sit at room temperature 10 minutes while towels absorb moisture.

    Sprinkle scallops on both sides with ground pepper. Heat 1 tbsp oil in 12 inch nonstick skillet over high heat until just smoking. Add half of the scallops in single layer, flat side down, and cook, without moving, until well browned, 1 1/2 to 2 minutes.

    Add 1 tbsp butter to skillet. Using tongs, flip scallops and continue to cook, using large spoon to baste scallops with melted butter (tilt skillet so butter runs to one side) until sides of scallops are firm and centers are opaque, 30 to 90 seconds longer (remove smaller scallops as they finish cooking). Transfer scallops to a large plate and tent loosely with aluminum foil. Wipe out skillet with wad of paper towels and repeat cooking with remaining oil, scallops, and butter. Serve immediately with lemon wedges or sauce.

    Sunday, January 29, 2012

    Spaghetti with Cauliflower Pesto


    I think my family knows that I like to cook and that I really want to take this blog more seriously in 2012. Many of my birthday and Christmas gifts this year were centered around cooking and blogging. I got a bunch of different plates and bowls in all different patterns and sizes to use to photograph the food I make. I got 4 new cookbooks that are all wonderful in their own ways and I can't wait to use all of them starting today with this wonderful recipe. And my big present from Joe was a DSLR camera which has been really fun to use so far. I can't wait to learn all the things it can do and hopefully take better photos as the year progresses. I personally already see a difference between the photos taken with the new camera versus my old point and shoot and I don't even really know what I am doing with the new camera yet. Do you notice a difference?

    One of the books that Joe got me is called Cooking for Friends and it is a really great book which not only gives you recipes but also ideas about plating and serving food and good cocktail pairings as well. A lot of the food is simple and fresh but prepared in ways that maybe you wouldn't think of. This recipe is a great example of that. We love cauliflower. Boiled, steamed, mashed, roasted, raw, plain, with cheese, you name it, we like it. I never in a million years considered making it into a pesto and serving it over pasta but it works. This was really light and flavorful and a perfect complement to the seared sea scallops that I made to go with it.

    Be aware that this recipe makes a lot of pesto so it would be great for having a group of friends over, hence I guess the name of the cookbook. We had leftovers for quite awhile since I made this for just the two of us.

    Spaghetti with Cauliflower Pesto
    From Cooking for Friends

    Ingredients
    1 small head cauliflower, cored and cut into 1-inch florets
    sea salt
    ground pepper
    1 cup extra virgin olive oil
    1 cup fresh flat leaf parsley
    1/2 cup almonds, toasted (I used pine nuts since I didn't have any almonds)
    2 tsp capers
    2 cloves garlic, minced
    1 lb spaghetti
    1 cup Parmesan cheese, shaved

    Directions
    Preheat a stove-top grill pan over high heat.

    Season cauliflower florets with salt and pepper. Place on grill pan and cook, turning occasionally, until well charred on all sides, 6-8 minutes. Transfer cauliflower to a food processor and add olive oil, parsley, almonds, capers and garlic. Pulse until mixture is well combined but still coarse. Set aside.

    Bring a large pot of salted water to a boil. Add spaghetti and cook, stirring occasionally to prevent sticking, until pasta in al dente, according to package directions. Drain, reserving about 1 cup of cooking liquid, and transfer to a serving bowl. Toss with cauliflower pesto and shaved Parmeson, adding some of the cooking liquid if necessary (you won't always have to do this. I wound up adding maybe a 1/4 cup of it). Serve at once.


    Related Posts Plugin for WordPress, Blogger...