Tuesday, September 20, 2011

Banana Cupcakes with Nutella Frosting


I seem to be on a cooking with bananas kick.  I am not sure if it is because we just aren't eating the bananas in time before they get too ripe or if I am just really into banana recipes recently.  Maybe a little bit of both.  Anyway, this recipe was recommended on a message board that I visit frequently and I was hooked when I saw the title.

I love Nutella.  I first discovered Nutella when I was a 14 year old exchange student in Germany.  It was on the table every morning for breakfast along with warm rolls bought that morning from the local bakery.  The wonderful chocolate hazelnut spread would melt into the warm roll and it was just heavenly.  I remember bringing some back to the US with me at the end of that summer but it was quite a few years before it made its way to our supermarket shelves.  Just looking at that jar brings back lots of memories.

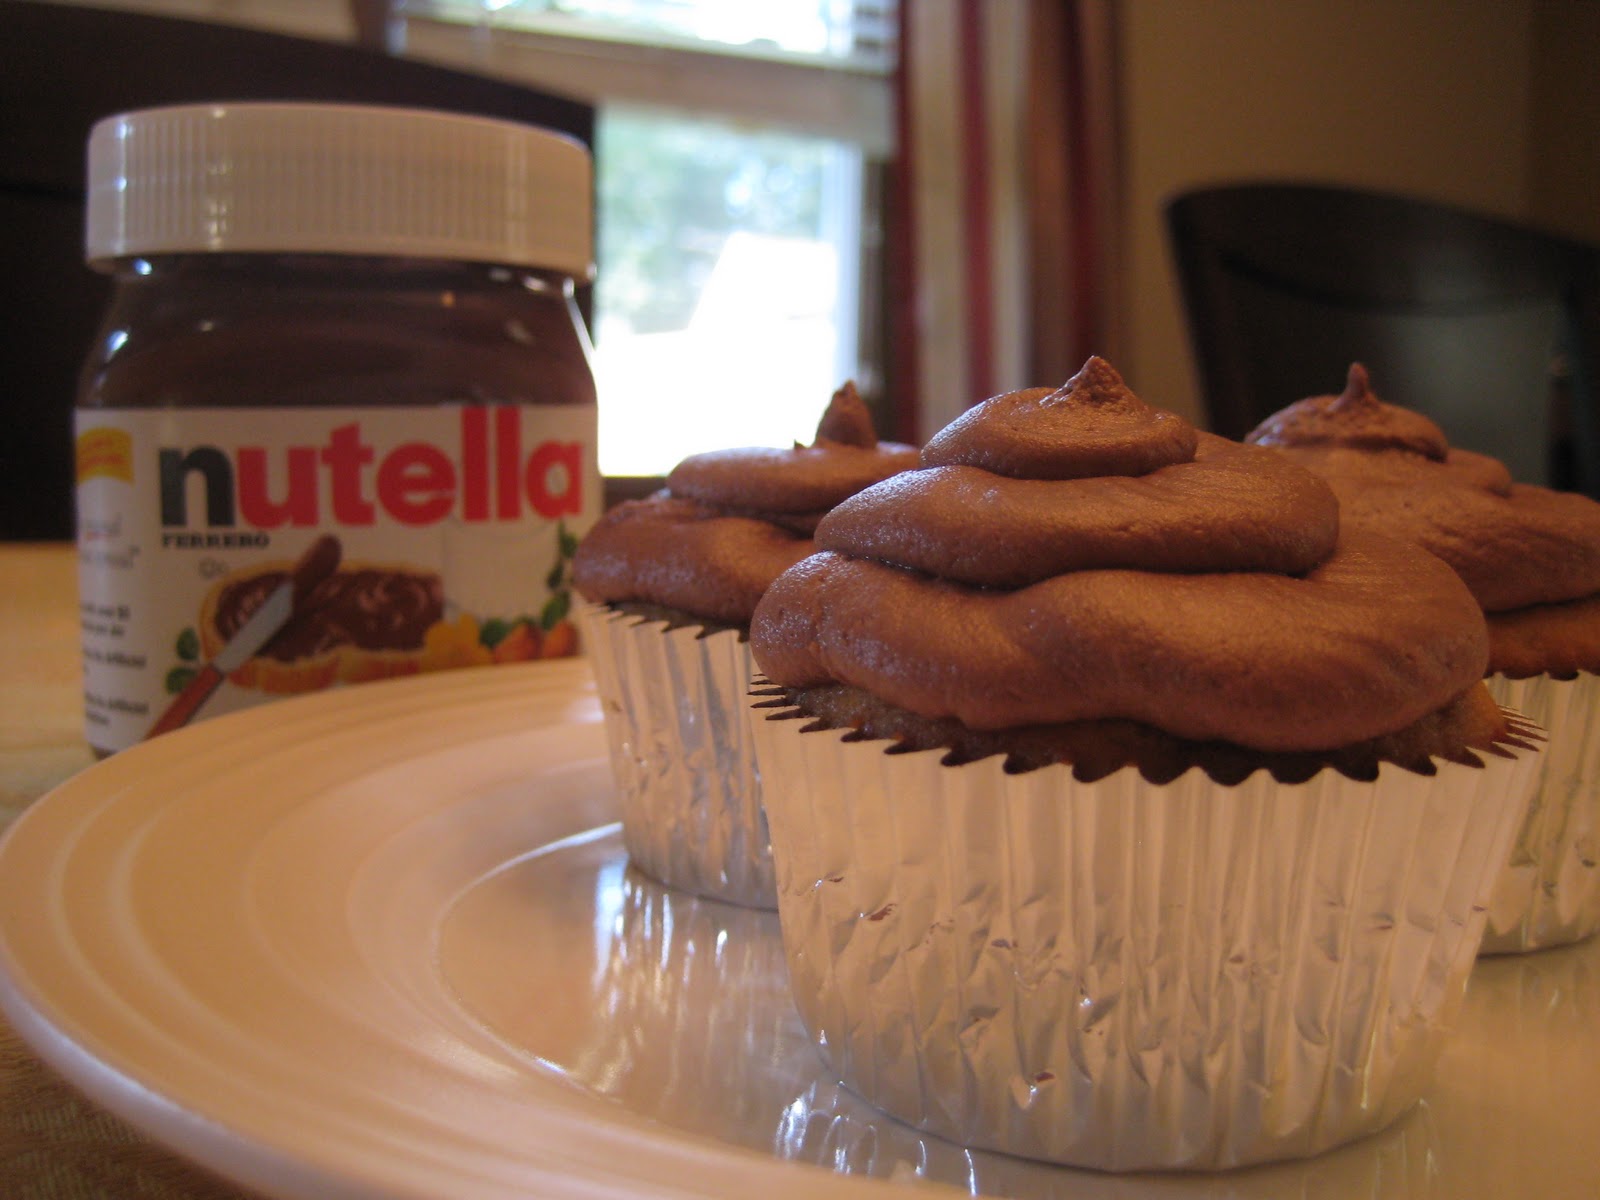
So I again found myself with very ripe bananas at home so I decided to give this recipe a try.  The cake was very moist and tasty.  The banana flavor was definitely present.  The frosting is what steals the show in this recipe.  It is just wonderfully light and fluffy, almost mousse like in texture and the Nutella flavor really comes out.  I am already envisioning using this frosting in other ways.

Banana Cupcakes with Nutella Frosting
From French for Cupcake

Ingredients:
For the cupcakes
1 1/2 cups self rising flour
1/4 tsp salt
4 oz unsalted butter, softened
3/4 cup sugar
1 tsp vanilla extract
3 large very ripe bananas, mashed

For the frosting
4 oz unsalted butter, softened
1 cup Nutella
8 oz powdered sugar
3 tbsp. milk or cream (I used cream)

Directions:
Preheat oven to 350 degrees F.  Line 16 muffin cups with paper liners.  Sift the flour and salt together in a mixing bowl and set aside.

Cream together the softened butter and sugar until light and fluffy.  Ass the vanilla and the eggs, 1 at a time mixing well after each addition.  Add the flour mixture and blend ingredients together until only just combined.  Stir in the banana.  Blend mixture until ingredients are fully incorporated.  Portion batter into muffin cups.  Bake 25-30 minutes until cakes are light golden brown and tester comes out clean.  Cool completely on a wire rack.

While the cupcakes are cooling, cream together the butter and Nutella until blended.  Add the powdered sugar gradually until ingredients are combined.  Mix on high speed, adding in milk or cream until frosting is smooth or creamy.  You may need a little more or less cream or milk.  I wound up using about 3.5 tablespoons.  Fill a pastry bag and pipe frosting over the top of each cooled cupcake.


Friday, September 16, 2011

Deep Dish Pizza


We have had a lot of fun this summer making pizza at home.  We have used all kinds of different sauces and toppings and are just about convinced not to order take-out pizza anymore.  Why would we when we can make exactly what we want at home for less money in just about the same amount of time?  We were at the mall last weekend getting Joe a new cell phone and of course I had to drag him into all of my favorite stores, Restoration Hardware, Pottery Barn, Williams Sonoma and Crate and Barrel (do you see a pattern here?).  At Crate and Barrel we stumbled upon this table with all kinds of pizza making and serving pieces.  One of them was a deep dish pizza pan.  Joe brought it over to me and we looked at each other with the same expression on our faces.  What a great idea it would be to expand our pizza making options to include deep dish as well as traditional NY style pizza.  The pan was only $18.95 so it was definitely coming home with us.  We picked up a few really neat looking European beer mugs and we were off.

Two days later we made our first deep dish pizza and I have to say, it came out really good.  The pan made a 15 inch deep dish pie and we were only able to eat a quarter of it for dinner that night so I had some for dinner the next night while Joe was working late, he had some for lunch the day after that and we both had it for dinner another night.  Needless to say it fed us for awhile.  We reheated it in the convection toaster oven and it came out just as good as the first time we ate it.  I will be making this again.

The only thing to keep in mind if you want to make this recipe is timing.  The dough needs at least 6-8 hours to rest in the refrigerator so make sure you either make your dough first thing in the morning or even the night before you want to make and eat the pizza.  Joe has pictures of the entire pie in the pan on his new cell phone.  As soon as he sends them to me, I will put one up so you can see what the entire pie looks like.

Deep Dish Pizza
Adapted from Pizzamaking.com

Ingredients
For the dough
3 1/2 cups all purpose flour
1 1/2 cups water
1/2 cup self rising white corn meal
1/2 cup canola oil
1 tsp sugar
1 tsp salt
2 1/4 tsp instant yeast

For the pizza
1 recipe dough (see above)
1 28 oz can crushed tomatoes in puree
1 tbsp dried Italian seasoning
2 tsp garlic powder
1 tsp onion powder
1/2 lb ground beef
2 links sweet italian sausage
1 red bell pepper, large dice
5 oz cremini mushrooms, sliced
3/4 - 1 lb mozzarella and provolone cheese, sliced
3 tbsp Parmesan cheese, grated

Directions
In a the bowl of a stand mixer, add the water, sugar, yeast, flour, corn meal and salt.  Mix with paddle attachment on low speed for a couple of minutes until dough comes together, then slowly add the oil.  Switch to dough hook and continue to mix dough for 7-9 more minutes until it is wet and smooth.  It should be tacky but not sticky to the touch.  Form the dough into a ball and place into a well oiled bowl.  Loosely cover with plastic wrap and then a dish towel and put in the refrigerator for at least 6-8 hour or overnight.

Take the dough out of the refrigerator about one hour prior to making the pizza.  Set the bottom oven rack to the lowest position and preheat the over to 450 degrees F for at least 30 minutes prior to baking.

In a medium pot, combine crushed tomatoes, Italian seasoning, garlic powder and onion powder.  Cook over low heat for 30-45 minutes.

In a large skillet cook ground beef until cooked through.  Set aside.  Place sausage links in the pan and cook 8-10 minutes, turning occasionally.  Remove links from pan and slice thinly.  Place slices back in the pan and continue to saute until browned on both sides and cooked complete.  Remove from pan and set aside.  Add bell pepper and mushrooms to the pan, adding some olive oil if need be and saute until cooked 4-5 minutes.

Coat the bottom of a 15 inch deep dish pan with oil.  Place the dough ball in the center of the pan and press it out until lit covers the entire bottom.  Then, using your fingers, pull the dough up the sides of the pan.  The edge should be pinched against the sides of the pan.  If the dough resists holding shape, cover with a towel and let rest for 15-20 minutes before trying again.

Cover the bottom of the dough with the sliced cheese.  Add the ground beef, sausage, peppers and mushrooms on top of the cheese.  Top with the tomato sauce.  Sprinkle the Parmesan cheese on top of the tomatoes.

Place in the center of the bottom rack of the oven and cook for 20-25 minutes, turning once half way through.  Remove from the oven and let cool for about 3 minutes.  Slice into wedges and serve hot.


Wednesday, September 14, 2011

Chunky Apple Cupcakes with Cream Cheese Frosting


Joe and some of his crew at work had to work really late this past Tuesday night so we thought it would be nice if we brought them dinner and dessert so they didn't have to worry about buying anything to eat.  Good thing we did, since they wound up being there until after 11pm!  I made a pan of macaroni and cheese with bacon and vegetables per Joe's request.  I guess he hadn't gotten enough of it from a couple of weeks ago.

He left the dessert portion of the night entirely up to me.  I had a bunch of apples that I needed to use and I didn't want to do a pie or tarts so I started looking at apple cake recipes.  I found this recipe on My Recipes and decided to make them into cupcakes which are easier to transport and serve at work over a whole cake.  I used my own cream cheese frosting recipe which you can find here and just made a 1/2 batch of the frosting since this recipe makes only about 18 cupcakes.  Joe came home with an empty pan and an empty cupcake container and rave reviews for both dishes.  He also told me that there were a couple of request for the apple cake recipe so for those of you who asked, here it is.


Chunky Apple Cupcakes with Cream Cheese Frosting
Adapted from My Recipes

Ingredients
1/2 cup unsalted butter, softened
2 cups sugar
2 large eggs
1 tsp vanilla extract
2 cups all purpose flour
1 tsp baking soda
1 tsp salt
2 tsp ground cinnamon
1 tsp ground nutmeg (freshly ground is preferable)
4 apples, peeled, cored and cut into 1/4 inch chunks (I used a mix of Jazz and Granny Smith)
1/2 Batch Cream Cheese Frosting

Directions
Preheat oven to 350 degrees F.  Line cupcake pan(s) with 18 paper liners.

In a mixer, using the paddle attachment, mix together the butter, sugar, eggs and vanilla until blended.

In a small bowl, combine flour, baking soda, salt, cinnamon and nutmeg.  Add to butter mixture and mix until just incorporated.  Stir in the apple chunks by hand and divide evenly among cupcake pan.

Bake for 35-40 minutes or until a wooden pick inserted in the center comes out clean or with just a few crumbs clinging to it.  Cool completely in pan on wire rack.  Spread with cream cheese frosting.  Store in airtight container in the refrigerator if not serving immediately.


Monday, September 12, 2011

Banana Bread


We eat a lot of bananas in our house, but just like with the banana ice cream I made last month, sometimes we don't get to them all in time and they start getting too ripe to eat raw.  It happened again a couple of weekends ago so I had to come up with something to do with them.  Again, I may have been rushing fall again a bit but my first thought was banana bread.  I have been searching for a banana bread recipe for some time and just hadn't found one that I really liked.  I decided to hit the internet and try to find a new one to try with these bananas that were crying out to be eaten.  I found this recipe from Williams Sonoma and decided to give it a try.  I am glad I did.  The bread was nice and crusty on the outside and soft on the inside.  I wish it had a little bit more banana flavor and next time I will adjust the amount of banana I use.  The recipe below takes this into account and I have already adjusted it to add more banana to the batter.  I also added some chopped walnuts that weren't in the original recipe since I had them in the house.  You can very easily leave these out.  This was great for a quick breakfast or a snack and it was really good with a scoop of vanilla ice cream for dessert.  So versatile!

Banana Bread
Adapted from Williams Sonoma

Ingredients
1 2/3 cups all purpose flour
2 tsp baking powder
1/2 tsp salt
1/4 tsp baking soda
4 medium very ripe bananas, peeled
2/3 cup sugar
1/3 cup vegetable oil
2 eggs
1 1/2 tsp vanilla extract
1/3 chopped walnuts (optional)

Directions
Preheat oven to 350 degrees F.  Grease an 8 1/2 x 4 1/2 inch loaf pan.

In a small bowl, stir together the flour, baking powder, salt and baking soda.

In a large bowl, smash the bananas with a fork.  Add the sugar, oil, eggs and vanilla and mix until well blended.  Add the flour mixture to the banana mixture and stir just until blended.  Fold in the walnuts.

Scrape the batter into the prepared loaf pan, spreading it evenly.  Bake for 40-45 minutes until a toothpick inserted into the center comes out with just a few crumbs clinging to it.

Remove from oven and let cool 15-20 minutes.  Remove from pan and continue to let cool on a wire rack for another 15 minutes (or if you are like me, immediately cut and eat a piece since I can't resist warm banana bread).

Friday, September 9, 2011

Macaroni & Cheese with Bacon and Vegetables


I am sorry, I have been neglected my blog.  Between earthquakes, hurricanes and over all life at the end of the summer, life has been busy the last couple of weeks.  I have been cooking and baking just haven't found the time to write about it so stay tuned for some new recipes in the near future, starting today.

Thankfully, we are all safe and sound with no major damage from mother nature's wrath and fall is coming which is one of my favorite times of the year.  The NFL football season kicked off last night and as many of you know, I LOVE football and all of the cooking that comes with it.  I am also dreaming of all of the soups and stews that I want to make.  I love fall comfort food baking.

I started in on the comfort food a few weeks early this year with this macaroni and cheese that I made a couple of weeks ago.  It was just one of those days and I needed some comfort food.  I had a lot of ingredients to make macaroni and cheese at home so I stopped off and got a couple of other things and put this recipe together.  I tried to make it healthier by adding mushrooms and broccoli but then I went and added bacon to it so that threw healthy out the window.  It was really good though and very filling.  We ate it for dinner and then for lunch for quite a few days afterward.  If you don't like mushrooms and/or broccoli you could substitute whatever veggies you like in this.

Macaroni & Cheese with Bacon and Vegetables
From Colleen's Kitchen Therapy

Ingredients
16 oz. elbow macaroni
4 oz. bacon, cut into small pieces
1 medium onion, diced
2 cups broccoli florets
5 oz. cremini mushrooms, sliced
6 tbsp butter, divided
5 tbsp flour
1 tsp garlic
1/2 tsp kosher salt
Fresh ground black pepper
Pinch cayenne pepper
8 oz cheddar jack cheese, shredded
4 oz fontina cheese, shredded
1/2 cup panko bread crumbs

Directions
Preheat oven to 375 degrees F.  Spray a 13x9 inch baking dish with non stick cooking spray.  Set aside.

In a large pot, cook elbow macaroni according to package directions being careful not to over cook.  In the last 3 minutes of cooking, add broccoli to the pot with the macaroni to blanch.  Strain and set aside.

While the macaroni is cooking, cook bacon until crisp over a medium-high heat in a 3 quart saucepan.  Remove crisped bacon and set aside on a paper towel lined plate to drain.  Add onions to the bacon drippings and cook 1-2 minutes.  Add the mushrooms and cook until they are soft, about 3-4 minutes.  Add 4 tbsp butter, garlic powder, salt, pepper and cayenne to the pot.  Once butter is melted, add flour and stir to incorporate.  Cook fat and flour mixture for 2-3 minutes till all of the raw flour is incorporated.  Whisk in the milk and stir mixture until all of the flour is incorporated into the milk.  Cook, stirring frequently until it just starts to come to a boil and the mixture has thickened.  Turn heat to low and add in the shredded cheese, stirring until all of the cheese is melted into the milk mixture.  Pour cheese sauce over macaroni and broccoli and mix until coated.  Pour into baking dish.

In a small bowl mix the panko bread crumbs and 2 tbsp of melted butter together.  Sprinkle over the macaroni and cheese.  Bake 25-30 minutes until panko is browned and cheese sauce is bubbly.  Serve hot.
Related Posts Plugin for WordPress, Blogger...